That being said, Amos is most content when he is in our laps or in our arms. As you can imagine, this limits productivity. Seth and I have found that when we are out in the carport working on a project, Amos will curl up, take a nap, and leave us alone if he has a pet bed outside. Yes, yes - he is super spoiled and doesn't like to sprawl out on the concrete like a normal dog. I am aware of his issues.

The problem with this bed is that leaves, pieces of acorns, dead insects, really anything and everything stick to it. Probably because it was designed for indoor use. So I decided that we needed to build Amos an outdoor bed.
Since Amos weighs a mere six pounds, we scaled the bed down a bit. We used smaller PVC pipe and our dimensions are smaller overall. We found all of the PVC pipe supplies in the plumbing section at Lowe's, the screws in the hardware section, and the duck cloth at JoAnn's.
Our supplies:
- 8 feet of 1/2" diameter PCV pipe (our store had a 10 foot length so we had extra)
- 4 1/2" PVC caps (NOT the threaded ones)
- 4 1/2" PVC 90 degree side outlet elbows
- 3/4 yard of duck cloth
- #8 1/2-inch truss phillips self-drilling screws
Tools:
- drill
- channel lock pliers
Cost: ~$15 (the screws are the most expensive part - the smallest quantity we could find was a 100 count box)
We decided to make our bed 18" x 24" with 4" legs. Therefore, we cut our PVC pipe into two 18" pieces, two 24" pieces, and four 4" pieces. Then we gathered our supplies and got to work. (Sorry for the crappy night time photos. It seems to be the only time we have to get these things accomplished.)

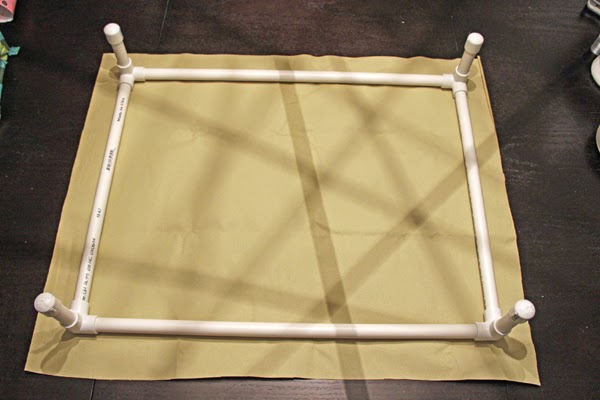
We started by assembling the frame.

We added the legs and caps, placed our fabric underneath the frame, and cut it to size.
Then, we folded the corners in so that the edges were just inside the corners of the frame.

Next, we started with one of the 24" sides and folded the edge of the fabric under a couple of times for a finished edge before beginning to secure it to the underside of the PVC frame with the truss screws.
As the video recommends, we placed all the screws on one side and then turned the bed around to work on the opposite side. We folded the fabric under and secured the center of the fabric with one screw. Then, we used the channel lock pliers to twist the PVC pipe inward about 1/4 of a turn. This helps tighten your material so that it will turn out nice and taut for your pooch. After all, you can't have their bottom sinking to the ground.

We then continued placing screws on the second side until the fabric was secured. Next, we repeated these steps on the shorter sides of the bed (again, securing one side fully, placing one screw in the opposite side, and then twisting the PVC pipe with the channel locks a bit before placing the rest of the screws).

Next, flip your bed over and use a few screws to secure the corners. The two outer screws on our corners went through the corner PVC piece and into the PVC pipe sides thereby eliminating the potential for the sides to spin.

And that's it! If your bed will be on a slick surface, you can apply some hot glue to the bottom of your caps to create friction and help prevent the bed from sliding. I was planning to do this, but got lazy and so far we haven't had a problem. I may get around to it one day though.
Now, bring it outside and let your pup enjoy!


There may or may not have been a landscape crew in the front yard at the house next door while I was snapping these photos. I can only imagine what they were thinking...crazy chihuahua owner having a private photo shoot with her dog. Oh well.
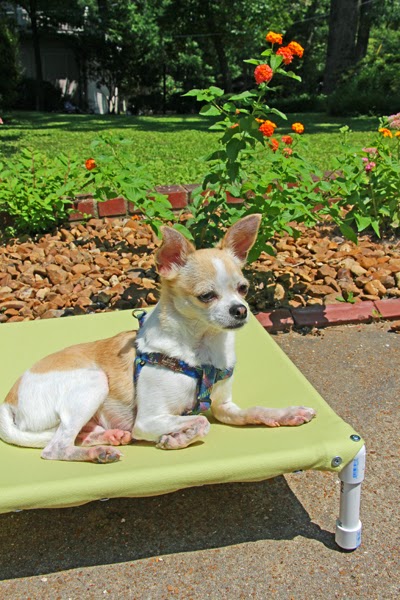
What's important is that Amos loves his new bed! :)
This comment has been removed by the author.
ReplyDelete